Sunday, October 16, 2011

King Cake: The Mardi Gras Birthday Edition

This month my dad celebrated his 50th birthday.  Originally we were supposed to take a family trip to New Orleans to celebrate because that is his favorite place in the world.  Due to work reasons, he had to cancel.  I felt bad that he wasn’t able to celebrate in the one place he wanted to be.  You may not know this but I have a crazy obsession for planning parties.   I decided to plan a surprise party for him….New Orleans style. 
We had the Mardi Gras colors, foods, beverages, and desserts of course.  My contribution was king cake and bananas foster cupcakes.  


The king cake made me nervous because I didn’t want to screw it up.  Pressure for sure.  How about it was the most delicious thing I have ever had.  I mean melt in your mouth good.  It was really fun to make too.  But lets focus on how amazing it was.  I wanted to eat more than I did.  Then I ate some for breakfast.  
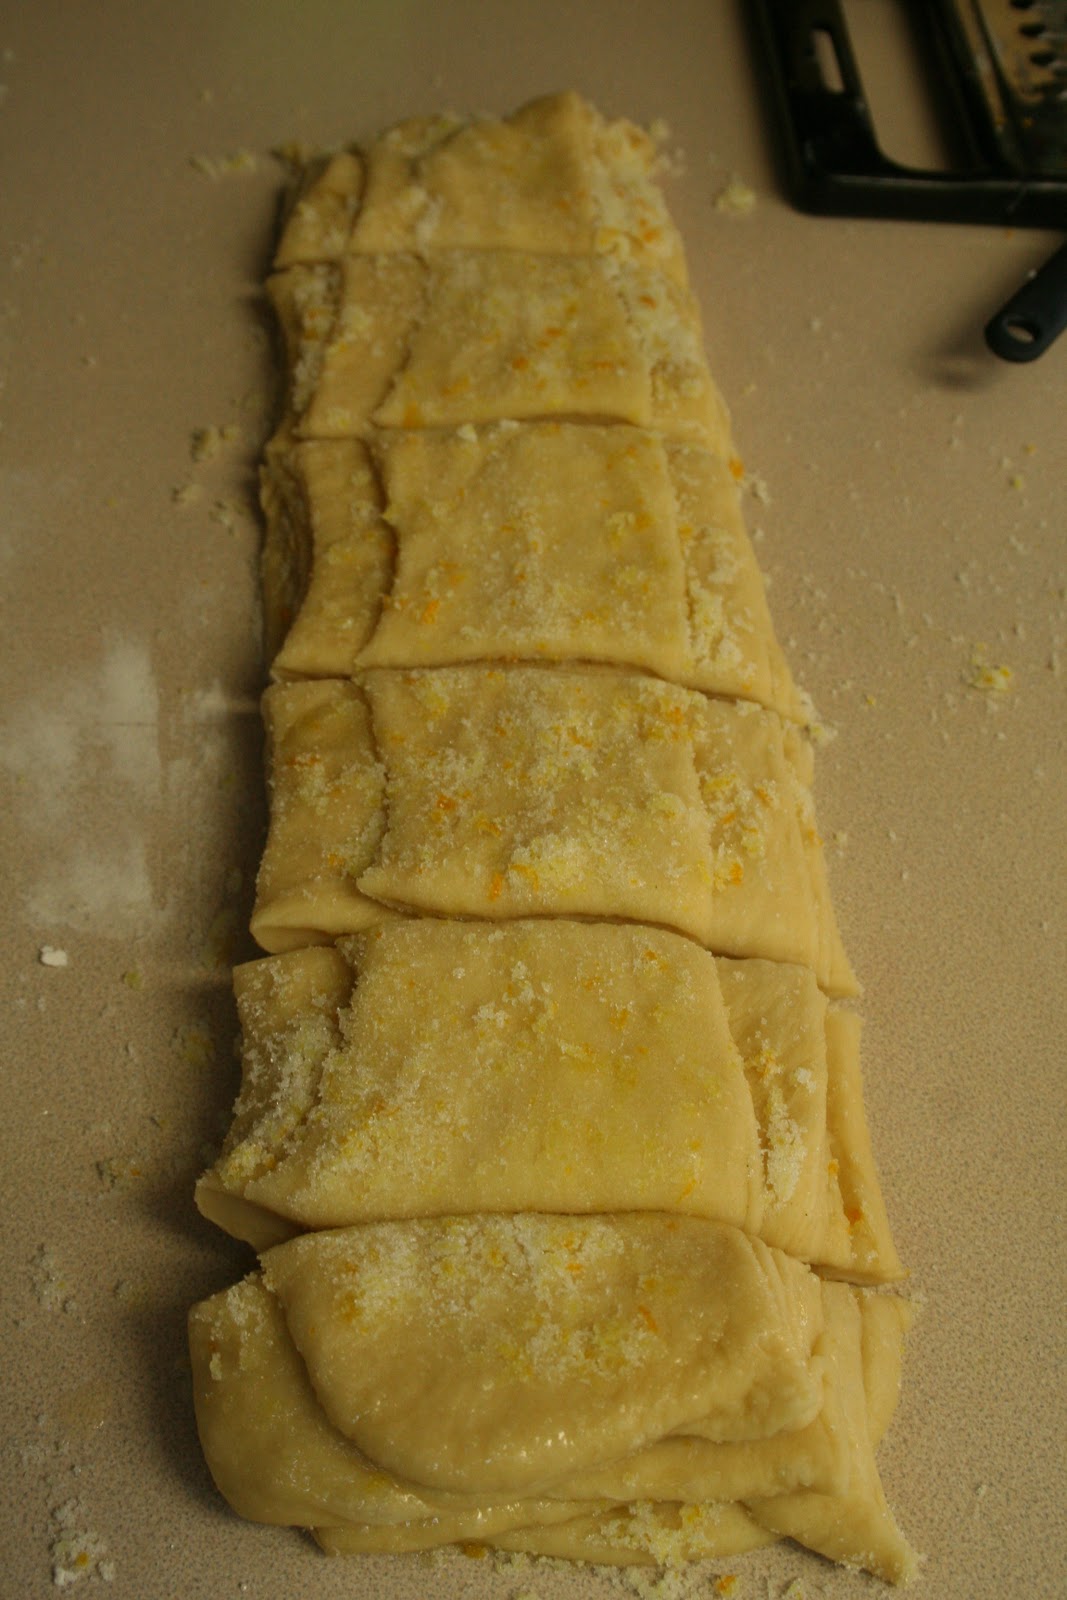
Things got a little messy
 

Sweet delicious creamy filling
 
 What is king cake?  I am surprised king cake is not as well known as I expected.  I am not from New Orleans and I have never celebrated Mardi Gras, but I have had it from our local grocery store.  You will find king cake around the Mardi Gras season (February).  What I didn’t know and what Wikipedia was so gracious to tell me was king cake season is from the end of the Twelve Days of Christmas until Mardi Gras day.  It is bread like dough with a sweet filling and within the dough is a small baby.  (Don’t worry….no plastic babies were harmed during the baking of the cake).  The catch is if you are given a piece with the baby, you have to bring the king cake to the next party or host the next party.  (My dad got the baby in his slice). The cake is topped with a sweet icing and colorful sugar.  

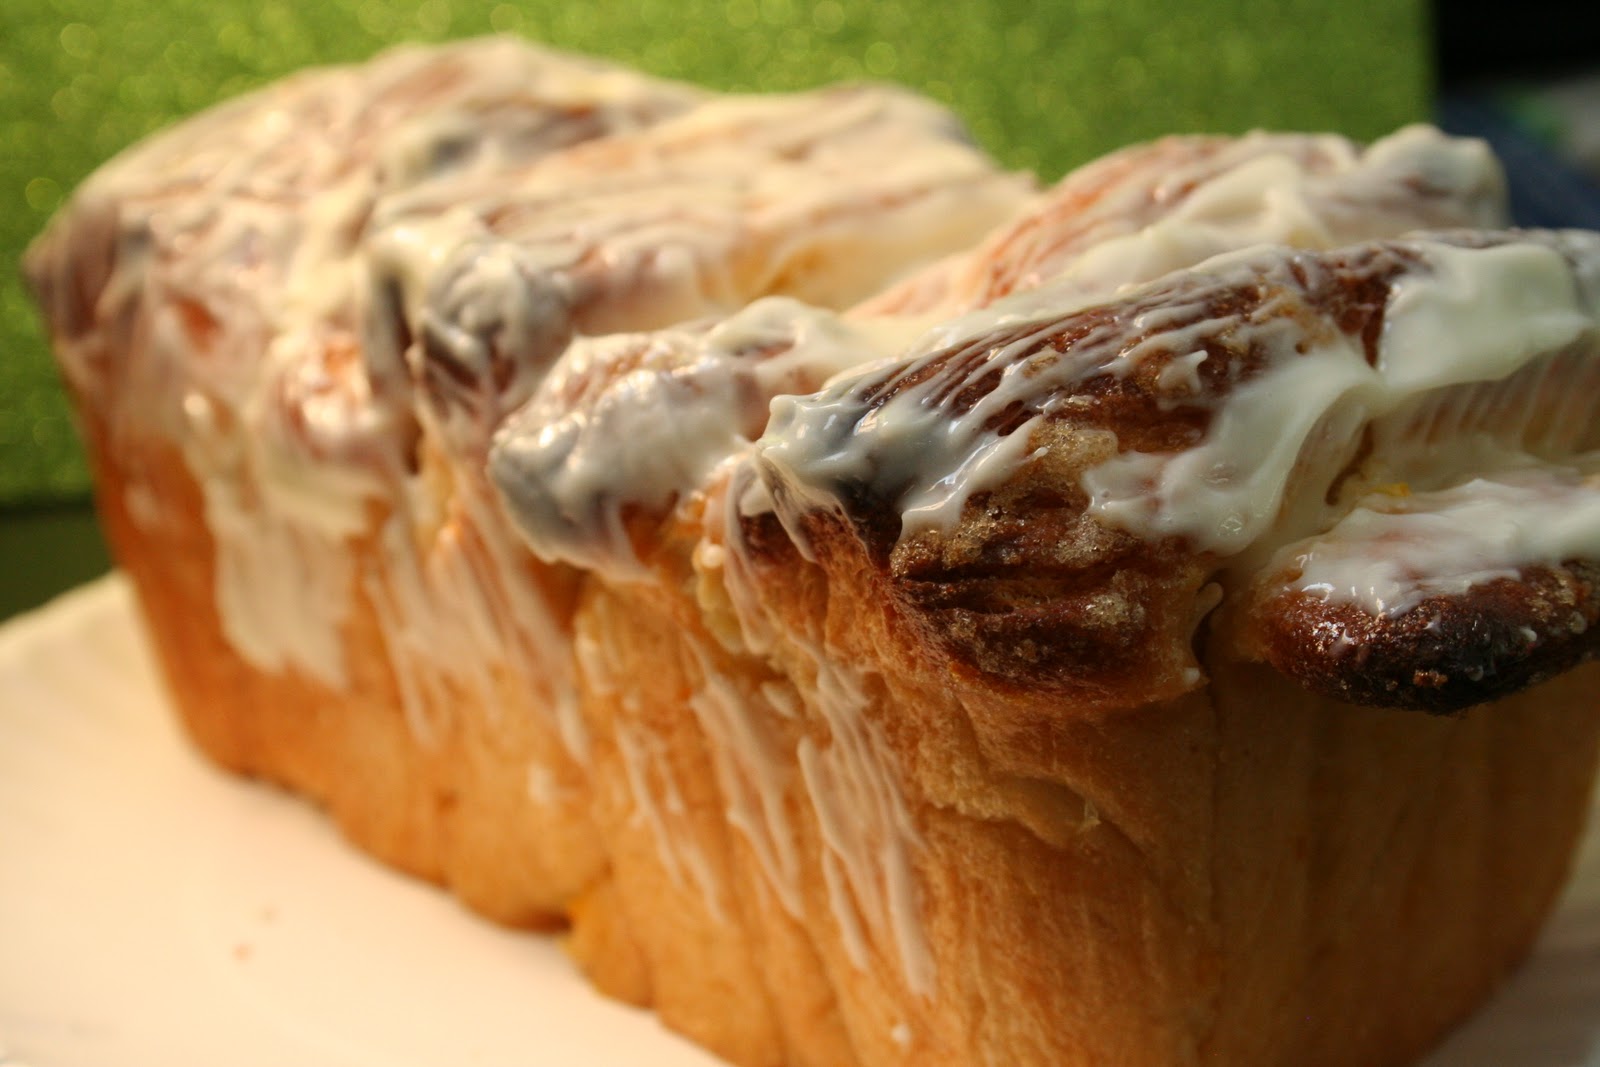
My king cake had a cream cheese filling and the filling was so creamy and smooth it complimented the thickness of the dough.  It was a true winner around these parts. 
If someone emailed me and said they wanted this king cake for their next party, Id do it because it was THAT GOOD!

Sunday, October 9, 2011

The Errors of Baking

I guess its that time I share with you one of my epic fails in this baking experience.  So you may remember my “being a bad friend because I don’t send things on friend’s birthdays” post.  For one friend it kinda worked out.  We only had one casualty.  For my other friend I had a few things to send and new ideas on how to send a cupcake in the mail.
Send it in a mason jar.  Why not?  I have seen it all over blogland and have heard such good things about the end result.  I went to Hobby Lobby (or was it Michaels?) and bought a small sized mason jar.  I was going to bake a cupcake in the jar, frost it, and sent it on its way to Atlanta.  I googled her work address because I wanted it to arrive on her birthday while she was at work.  Who doesn’t love surprises at work?  
I was excited about the recipe, confetti cake and vanilla frosting.  Topped with sprinkles of course.  I was excited to try this technique.  I made the cake and filled the mason jar with batter.  Let me first tell you that you don’t want to fill it over the halfway mark.  It will rise and start to look like it will take over your oven.  Oops.  You also want to bake it in a water bath.  I placed the jar in a small pot filled with water.  My conclusion is this keeps the glass from breaking?  I saw a few places that said it is a must to water bake and being the follower that I am, I did it. 
It took forever to bake.  I mean almost as long as a normal sized cake would.  That is what happens when you get greedy and try to fill the jar completely.  
I filled it a little more than this....and by a little I mean a lot.
 
 After almost an hour of waiting I took the jar out of the oven to find the center was still completely raw.  I did make 4 little cupcakes with the leftover batter and those cooked at normal time.  Then the batter deflated.  EPIC FAIL! 
The frosting came out but all I had was a cream cheese based frosting so I knew that would not ship without disappointing results.  

 I would be lying if I said I wasn’t sad this didn’t work out.  I was so bummed.  I hated that I had to tell my friend there was no awesome surprise coming.  BUT to be fair, I will be back home to Atlanta soon enough and I can rebake that confetti cupcake and it is going to be awesome.  
What baking disaster have you dealt with recently? 
I am so excited to share the next post with you!  Stay tuned!

Tuesday, October 4, 2011

Lemon Pull Apart Bread

I am what you call a bad friend.  I am bad about sending gifts and cards on friend’s birthdays.  I don’t know why because I always have great gift ideas to send to my friends, but it never happens.  (SORRY!).  One of my bestest friends and I share our birth month together (July if you are keeping track) and for my birthday she sent me some funny gifts.  I had the ultimate gift to send her, but it involved taking a video to show it worked and I didn’t see it being successful unless I was there.
Then my life got extremely busy.  No excuse but I could barely breathe it was so busy.  One weekend I found this recipe for lemon pull apart bread and knew she would love it.  While I was reading the directions I was a little nervous to tackle something that seemed so complicated. Have you seen all the directions? I knew I would screw this up.  The one thing that discouraged me a little bit was there were no pictures for the steps that I felt needed pictures. 
 A few weekends ago while we were refinishing our kitchen table (hooray to soon having a place to eat dinner) I started prepping to make this “complicated” bread.  Let me tell you a little something….it was easy AND I took pictures of the directions that needed pictures.  Just for you.  Because I love you all.
The plan was to only make 1 pan for my friend and send it to her in Wisconsin, but I was lucky because the recipe made two.  One for little old me!
Lemon-Scented Pull-Apart Coffee Cake
From 17 and Baking
Makes a 9″x5″ pan (mine made 2 8x4 pans)
Sweet Yeast Dough
About 2 3/4 cups (12 1/4 ounces) all-purpose flour
1/4 cup (1 3/4 ounces) granulated sugar
2 1/4 teaspoons (1 envelope) instant yeast
1/2 teaspoon salt
1/3 cup (2 1/2 fluid ounces) whole milk
2 ounces unsalted butter
1/4 cup (2 fluid ounces) water
1 1/2 teaspoons pure vanilla extract ( I used a little more bc that is what I do)
2 large eggs, at room temperature


Lemon Sugar Filling
1/2 cup (3 1/2 ounces) granulated sugar
3 tablespoons finely grated lemon zest (3 lemons) (I think 1 lemon was enough)
1 tablespoon finely grated orange zest
2 ounces unsalted butter, melted


Cream Cheese Icing
3 ounces cream cheese, softened
1/3 cup (1 1/4 ounces) powdered sugar
1 tablespoon whole milk
1 tablespoon fresh lemon juice


Making the Dough
Mix two cups (nine ounces) flour, the sugar, yeast, and salt in a medium bowl with a rubber spatula. 


Meanwhile, in a small saucepan or in the microwave, combine the milk and the butter and heat until the butter is melted. Remove from the heat, add the water, and let rest a minute until just warm (120 to 130°F [49 to 54°C]). Stir in the vanilla extract.

Pour the milk mixture over the flour-yeast mixture and mix until the dry ingredients are evenly moistened. Attach the bowl to the mixer, and fit the mixer with the paddle attachment. With the mixer on low speed, add the eggs, one at a time, mixing after each addition just until incorporated. Stop the mixer, add 1/2 cup (2 1/4 ounces) of the remaining flour, and resume mixing on low speed until the dough is smooth, 30 to 45 seconds. Add 2 more tablespoons flour and mix on medium speed until the dough is smooth, soft, and slightly sticky, about 45 seconds.

Lightly flour a work surface and knead the dough gently until smooth and no longer sticky, about one minute. If the dough is still too sticky, add a tablespoon of flour.  Place the dough in a large bowl, cover it with plastic wrap, and let it rise in a warm place (about 70°F [21°C]) for 45-60 minutes or until doubled in size. An indentation made with your finger should keep its shape.

Meanwhile, make the lemon sugar filling. Mix the sugar, lemon zest, and orange zest. Easy right?


Center a rack in the oven and preheat the oven to 350°F (175°C). Grease your bread pan (I had 2-8x4' pans)
Gently deflate the dough with your hand. Flour a work surface and roll the dough into a 20″ by 12″ rectangle. [I hope you like my technique of using the tape measure to measure out the dough..I like to add class to my baking] 


Use a pastry brush to spread the melted butter evenly and liberally over the dough.
Use a pizza cutter to cut the dough crosswise in five strips, each about 12″ by 4″. Sprinkle 1 1/2 tablespoons of the lemon sugar over the first buttered rectangle. Top it with a second rectangle, sprinkling that one with 1 1/2 tablespoons of lemon sugar as well. Continue to top with rectangles and sprinkle, so you have a stack of five 12″ by 4″ rectangles, all buttered and topped with lemon sugar. 


Slice this new stack crosswise, through all five layers, into 6 equal rectangles (each should be 4″ by 2″.) Carefully transfer these strips of dough into the loaf pan, cut edges up, side by side. The bread will rise more after this point.  Loosely cover the pan with plastic wrap and let the dough rise in a warm place until puffy and almost doubled in size, 30 to 50 minutes. When you gently press the dough with your finger, the indentation should stay.

Bake the loaf until the top is golden brown, 30 to 35 minutes. [Mine took a little longer than this.  I was nervous because the inside was a little doughy, but a little doughy is ok...IMO] Transfer to a wire rack and let cool in the pan for 10 to 15 minutes.

Now make the cream cheese icing. Beat the cream cheese and powdered sugar in a medium bowl with a wooden spoon until smooth, then add the milk and lemon juice. Stir until creamy and smooth. [I added milk until I got the texture I was happy with, so there may have been a little more than recommended]
Flip the loaf over onto a cooling rack.. Spread the top of the warm cake with the cream cheese icing, using a pastry brush to fill in all the cracks. 

This bread was amazing!  I think I ate half of mine in less than 30 minutes.  The amount of lemon was perfect and the icing gave the bread a nice texture. 
Now I had to get this bread up to my friend.  The bread I was not worried about.  The cream cheese frosting…I had doubts.  I bought a small plastic container and an ice pack in hopes I could keep the icing cool.  I put the icing in the freezer wrapped in the ice pack (because that is what my research told me to do) and wrapped it in tin foil.  I shipped it as quickly as I could (I think 2day) to avoid sitting on a truck or in a warehouse.  The bread made it perfectly and she said it was delicious.  The icing did not make it, was sour and curdled. YUCK!
Bright side: she got the bread!
Back to the drawing board to figure out how to ship baked goods.  Especially because I made a KILLER king cake this past weekend that I know I am ready to take orders on.  More on this cake later!
Next post: my big fail and just another reason I am not a good sending birthday gifts friend.  One day I will nail this.  
Linked up to these parties: 
Tatertots and Jello
Skip To My Lou
C.R.A.F.T.
Boogieboard Cottage
Today's Creative Blog

Monday, September 5, 2011

If you are having a bad day, eat this cake!

Happy Labor Day friends!  I hope you are enjoying your weekend!

This weekend there was a birthday celebrated around here.  It was requested for me to make a chocolate layer cake with a whipped cream frosting.  Its funny because I saw this cake awhile ago and said this is a birthday cake I am going to make.  We picked out a whipped cream frosting that was thicker than traditional whipped cream and I got to baking.
Rough exterior, delicious interior
First I made the frosting.  Its no secret around here, frosting and I do not play nice.  I dont know what it is.  Maybe I declared my dislike for powdered sugar a little too much?  I dont know.  Frosting NEVER works for me.

I was happy we found a whipped cream based frosting on Allrecipes to make instead.  I love cream cheese

Ingredients

  • 1 (8 ounce) package reduced-fat cream cheese, softened
  • 1/2 cup white sugar
  • 1 teaspoon vanilla extract (I used a vanilla bean paste and I used about a tsp and a 1/2)
  • 1/2 teaspoon almond extract
  • 2 cups heavy cream (I used 3)
  • 2 egg whites added last minute because peaks were not forming

Directions

  1. Combine the cream cheese, sugar, vanilla extract and almond extract in a large mixing bowl or the bowl of a stand mixer. Fit the mixer with the whisk attachment and mix on medium speed until smooth. While the mixture is still whipping, slowly pour in the heavy cream. Stop and scrape the bottom of the bowl a couple of times while you continue whipping until the cream can hold a stiff peak.  
Simple recipe right?  I guess not for me.  It turned into soup!  Delicious soup though.  I threw it in the fridge to firm back up.  Nope.  We threw in egg whites and that ended up helping a little. 

I followed the chocolate cake recipe I have used before, only I made some tweaks to change the flavor a little.  For this particular cake, you need to double this recipe. 
  • 1 3/4 cups all-purpose flour, plus more for pans 
  • 2 cups sugar 
  • 3/4 cups good cocoa powder (1/2 unsweetened Hersheys cocoa and topped off with Toll House cocoa)
  • 2 teaspoons baking soda  
  • 1 teaspoon baking powder 
  • 1 teaspoon kosher salt  
  • 1 cup buttermilk, shaken
  • 1/2 cup vegetable oil 
  • 2 extra-large eggs, at room temperature 
  • 1 teaspoon pure vanilla extract (I used a vanilla bean paste)
  • 1 cup freshly brewed hot coffee (1/8 cup of coffee)
  You can find how to make the cake here.  I was excited to try out my new flavor: vanilla bean paste. 
I found this at Home Goods and knew it was time to graduate from the Kroger brand vanilla extract.  Its not cheap though.

So how to make a 10 layer cake.  The first thing is to head to the Dollar Store and buy 12 aluminum pans.  Using these saves you from washing pans in between each round.  You are welcome!
Then take parchment paper and cut circles to line the bottom of your pans.  I took one circle and used it as a template for the rest. 

Line your pan, butter like butter is going out of style, and then flour your pan.  That wax paper is tricky to take off if you dont butter/flour it enough.

When your batter is ready to go, fill the pans with 2/3 cup of batter.  Spread evenly and place into your 350 preheated oven. 
I baked two pans at a time for 12 minutes each round.  They came out looking a little deflated and almost like a pancake.  Then I started to layer.  Please note the frosting was still soup. 
Still looks tasty though dont you think?  After layer 10 little cakes on top of each other, we poured the frosting soup on top and spread it.  Since it was so runny and we enjoy coconut, we threw it on the exterior.  Functional and delicious. 
I know this cake wouldnt win awards in presentation (because it was rough), but it was a diamond in the rough and it was REALLY good!!  The changes I made to the recipe made this a killer chocolate cake.  I had to stop myself from eating more than I did.  It was moister than you would ever imagine.  The chocolate flavor was perfect.  Every bite I MAY have done a little dance.  I am so pleased with this cake.
Next time I am sticking to regular frosting!!!  In all seriousness though, you must try this cake (mine not your own!!) because it will turn your day around!

Thursday, August 18, 2011

Shirley Temple Lil'cakes

Hi friends!  I have not lost interest in baking!  I have been super busy and baking took the backseat a bit.

Yesterday I decided the best way to handle current stress was to bake some delicious cupcakes.  You can always lift your mood with baked goods.  I found a great recipe on JavaCupcakes for Shirley Temple Cupcakes. 

Who doesnt love the flavors of a Kiddie cocktail?

Shirley Temple Cupcakes (The Curvy Carrot)
  • 1 1/2 cups plus 1 tablespoon all-purpose flour
  • 1 teaspoon baking powder
  • 1/2 teaspoon sea salt
  • 1/2 cup (1 stick) unsalted butter, at room temperature
  • 1 cup granulated sugar
  • 2 large eggs, at room temperature
  • 1/2 cup Cherry 7-Up, at room temperature  (use regular...I dont trust diet)
  • 1/2 teaspoon vanilla extract
  • 1/2 teaspoon almond extract (I used about 3/4 tsp of almond)
  • 1 tablespoon maraschino cherry juice  (I used almost 2 tbs)
  • Red food coloring (2-3 teaspoons, more if desired)  (I used 2, but I think for a lighter color you will use a little less)
Yield: 1 dozen (12) or 2 mini dozen (24)
  • Preheat oven to 350F and line cupcake pan with liners
  • In a medium sized bowl, whisk together flour (1 1/2 cups), baking powder and sea salt.
  • In a standing bowl mixer with the paddle attachment, combine the sugar and butter and cream until light and fluffy at least 2-3 minutes.
  • Add eggs, one at a time, scraping down the sides of the bowl after each addition.
  • Reduce speed to low, alternate adding half of  flour mixture and half of the Cherry 7-Up, beginning and ending with the flour.  Mix until combined.

 
  •      Add the vanilla & almond extract and mix until combined.
  •      Reserve 3/4 cup of batter in small bowl and combine with 1 tablespoon of flour, maraschino cherry ice and red food coloring.
  •  Evenly distribute pink/red batter in each cupcake liner and smooth out before adding the regular batter to each liner.
  • Try not to mix the 2 batters.
  • Bake for 15-20 minutes (for regular sized cupcakes) and 8-10 minutes for minis. It took about 13 minutes in my oven with the mini cake pans.  I started checking around 8 mins (very runny at this point)
     
    Buttercream
    • 1/2 cup (1 stick) unsalted butter, at room temperature
    • Pinch salt
    • 2 1/2 cups powdered sugar  (I think 2 1/2 cups was too sweet.  I will start with 1 cup and add by 1/4 cup increments)
    • 1/4 teaspoon vanilla extract
    • 1/8 teaspoon almond extract  (I used almost 1 1/2 tsps)
    • 1 teaspoon fresh lemon juice  (Since my frosting was too sweet I used about 2 1/2 tsps to tone it down)
    • 1-2 tablespoons maraschino cherry juice  (Start with 2 and add little by little to get the flavor you want)
    • 12-24 maraschino cherries with stem, for garnish
    1. In a standing bowl mixer with the paddle attachment, cream the butter until light and fluffy at least 2-3 minutes.
    2. With the mixer on low, add the pinch of salt, powdered sugar, vanilla extract, almond extract and lemon juice and mix until combined.
    3. Whip the buttercream until smooth and add the maraschino cherry juice to the buttercream and mix until combined. 
    4. Pipe with a star tip and garnish each cupcake with a cherry.


     These were great!  I am so so happy with the texture and consistency of the frosting.  I used the full 2 1/2 cups of powdered sugar and I thought it was a little sweet.  I would have liked the cake to have a little more cherry flavor, but I think this is easily fixed.

    A little note about the almond extract...it brings out the cherry flavor.  Just like coffee brings out chocolate.  The 7Up gave the cake nice moisture.

    I will definitely make this again!!

    In case you were wondering how I practice decorating the tops:
    In the sink.